The Travel Trailer Advantage Most Owners Never Think About
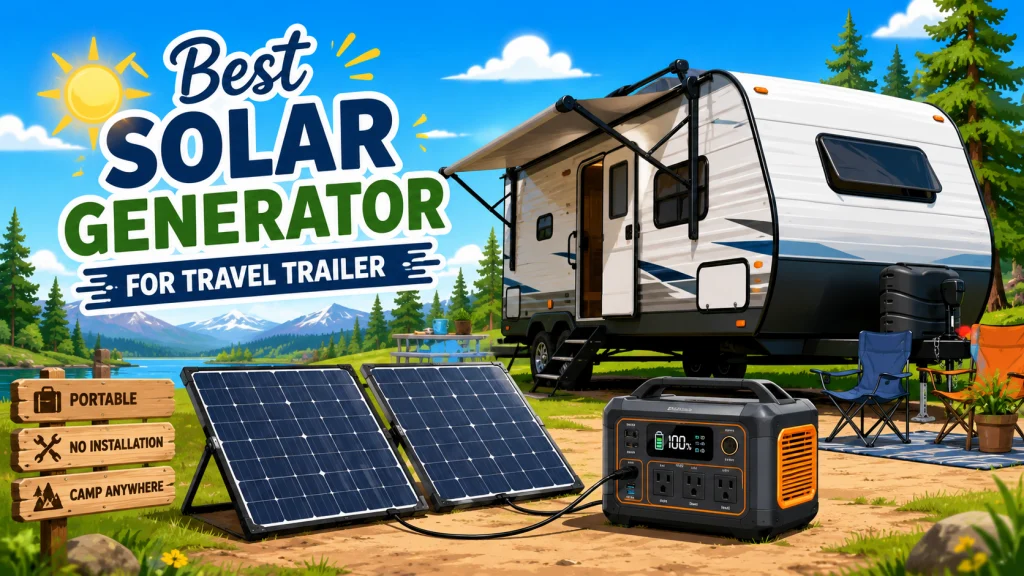
Finding the best solar generator for a travel trailer starts with an advantage that most owners overlook entirely: you can leave the unit outside at the campsite, panels still charging from the sun, while you unhitch the truck and drive somewhere else. A motorhome parks for the duration of the trip. A travel trailer separates. The trailer stays at the site, the panels stay deployed, and the unit gains back whatever it used the night before while you are gone for the day. That separation is the reason a well-matched travel trailer solar generator setup often outperforms a fixed rooftop install, even on paper.
The core travel trailer power situation is straightforward. At a developed campground, you plug into the 30-amp shore power pedestal and everything runs off external power. The solar generator covers the gaps: no-hookup sites, occupied or paid pedestals, and BLM land camps where no power exists. It is a supplement to shore power, not a replacement for it, and sizing for that role is very different from sizing a full-time off-grid system. Buyers who confuse the two consistently buy far more capacity than their trips require. If you are still working out which use case applies to your situation before going deeper on RV specifics, the guide on matching a solar generator to how you plan to use it covers the full picture across all use cases.
The truck separation also changes what kind of charging is realistic during the day. A fixed rooftop system charges while the trailer is parked, but it cannot be repositioned if the campsite puts the trailer in shade, and it is stuck facing whatever direction the hitch pointed when you backed in. Portable panels on the ground go where the sun is. Move them 10 feet south of the trailer and out from under the tree canopy, and they produce meaningfully more than panels stuck on a shaded roof in a fixed orientation. That flexibility is worth something, and it costs nothing extra.
Field Note: At the shop, I had more than a few travel trailer owners come in expecting a rooftop install quote in the $3,000-$4,000 range. When I walked through what they actually needed, power for two nights without hookups a handful of times per season, the answer in almost every case was a 1500Wh portable unit and two 100W panels. They left spending $900-$1,200. Most of them came back to confirm the setup worked exactly as described. The rooftop path would have cost three times as much and required drilling through the roof.

At 1,024Wh with 2,000W continuous output and 3,000W peak, this station powers up to 10 devices at once across a full suite of ports. HyperFlash charging fills it in just 49 minutes via AC, or 1.8 hours with 600W of solar. The UPS switchover triggers in under 10 milliseconds, and the LiFePO4 battery holds 80% capacity after 4,000 cycles for a 10-year lifespan.
Check On AmazonIf you click this link and buy, we earn a commission at no additional cost to you.
Why Your Trailer Roof Is Already Spoken For
A 26-foot travel trailer looks like it has plenty of roof space from the ground. Closer inspection tells a different story. A rear-mounted roof AC unit occupies a 25 x 24-inch footprint and requires clearance around it for adequate airflow. Two to four roof vents run along the length of the trailer. A TV antenna, a plumbing vent stack, and sometimes a roof hatch account for additional surface. By the time those obstacles are mapped out, many 24-26 foot travel trailers have fewer than 60 usable square feet of unobstructed south-facing roof. Installing 400W of rigid panels needs roughly 24-30 square feet of contiguous clear space. That math sometimes works out, but it frequently does not.
Fixed panel installations also require roof penetrations for the wiring runs. Each penetration is sealed with butyl tape and lap sealant, which holds fine on a stationary structure. A travel trailer bounces over roads at highway speeds, flexes in crosswinds, and sits in rain. Sealant around conduit penetrations degrades over time on a trailer that moves regularly. Inspecting and reapplying it is a real recurring maintenance task. Ground-deployed portable panels avoid the roof entirely. The cable runs inside through a door gap or a dedicated cable entry port. No holes in the roof, no sealant to monitor, no leak risk when the sealant eventually fails.
Budget for a rooftop install on a 24-foot trailer with one rear AC unit, two roof vents, a TV antenna, and a plumbing vent stack. Discover that fewer than 45 usable square feet of south-facing roof are actually available, the panels end up partially shaded by the AC housing in the afternoon, and two seasons later the lap sealant around the conduit penetrations is cracking and needs resealing before the next trip.
Buy a 1500-2000Wh portable unit and 200-400W of foldable ground panels. Deploy the panels outside the trailer before you leave for the day, angle them toward the south, and run the cable inside through the door frame. At the next campsite where the trailer faces a different direction, reposition the panels toward the sun regardless of where the trailer is pointing.
The one situation where a fixed rooftop install makes more sense for a travel trailer is full-time or near-full-time use, where you need maximum automated solar gain every day without setting anything up. For the weekend-to-extended-trip owner doing a handful of no-hookup nights per season, that trade-off does not pencil out. The portable setup handles the actual job for most travel trailer owners at a fraction of the cost and without the installation headaches.
What a Travel Trailer Actually Draws Overnight
Most travel trailer overnight loads are smaller than buyers expect when they start shopping. A 12V compressor refrigerator, the type installed in most modern travel trailers, draws 30-50W when running via the DC output of a solar generator. Run that same fridge through the inverter on 120V AC, and it draws 70-100W, because of inverter conversion losses plus the inverter’s own idle draw running continuously. Connecting the fridge to the DC output directly is the single most impactful efficiency decision in a travel trailer setup, and it is nothing more than a cable swap. Over an eight-hour night, that difference adds up to 200-400Wh of extra runtime from the same battery.
Beyond the fridge, the overnight load picture is modest. LED interior lighting runs 15-25W for the whole trailer. Device charging for two people adds another 20-30W. A laptop used for an hour or two in the evening draws 40-65W during that window. A 12V fan running through the night adds 15-25W on DC. Total overnight draw for a typical couple with those loads sits between 500-900Wh, depending on how long the lighting runs and whether the fridge is on DC or AC. A 1000Wh unit handles a single night comfortably, and a 1500Wh unit covers two nights before needing a recharge.
| Appliance | Typical Draw | Approx. Overnight Wh Use | Notes |
|---|---|---|---|
| 12V compressor fridge (via DC output) | 30-50W | 240-400Wh | DC connection eliminates inverter conversion loss |
| LED interior lighting | 15-25W | 60-100Wh | Typical 4-5 hours of evening use |
| Smartphones and tablets (2 people) | 20-30W | 60-90Wh | Tapers off as devices reach full charge |
| Laptop | 40-65W | 40-65Wh | Typically 1-2 hours of use per evening |
| 12V ceiling or box fan | 15-25W | 75-125Wh | Overnight use via DC output |
| Occasional small appliance (blender, coffee maker) | 600-1200W | 15-40Wh | Short-burst use only, a few minutes per use |
The short-burst appliances, a blender for two minutes, a drip coffee maker used once in the morning, contribute almost nothing to the overnight total because the runtime is so brief. Two minutes on a 1,000W blender uses about 33Wh. What those appliances do require is inverter output capacity to start them. A blender or coffee maker that draws 900-1,000W needs a unit whose inverter can handle that wattage. The inverter’s rated output, not the battery’s Wh capacity, is what determines whether the unit can start that load at all. Most units in the 1000-2000Wh class have enough inverter output to handle short bursts like these without issue.

This compact plug-in monitor tracks the energy consumption of any AC 115-volt appliance and displays real-time readings of volts, amps, and wattage at 0.2 to 2.0 percent accuracy. Its large LCD screen lets you calculate electricity costs by the day, week, month, or year, making it easy to spot energy-hungry devices and trim your utility bill. It is also compatible with inverters, adding flexibility for off-grid setups.
Check On AmazonIf you click this link and buy, we earn a commission at no additional cost to you.
Sizing the Right Unit for Your Trip Type
Trip length is the primary sizing driver. A standard weekend trip, two nights without shore power, is well within the range of a 1000-1500Wh unit with 200W of solar panels. Start with a full charge, draw 700-850Wh overnight, and gain back 700-1,000Wh during a sunny day with 200W of panels deployed and repositioned toward the sun. The math works with a comfortable buffer for a typical Friday-through-Sunday trip on modest loads. Most travel trailer buyers I’ve talked to fall into this pattern, and a 1500Wh unit is consistently the reliable starting point for a weekend trip with modest couple-sized loads.
A four or five-night stretch without hookups pushes the sizing toward 2000Wh. The overnight draw stays similar, but with five nights of use and variable solar input, the reserve buffer matters more. On a good day with 400W of panels producing 1,200-1,500Wh of real-world input, a 2000Wh unit stays net positive. On back-to-back cloudy days the math tightens, and the practical fix is either plugging into shore power when a pedestal is nearby, or using a gas generator for a 60-90 minute top-off charge. One gas generator run charges most 2000Wh units to 80% and gets you through another day and a half without it running again.
Note: A 2000Wh solar generator weighs 45-65 lbs depending on the unit. A loaded 24-foot travel trailer with a gross weight of 5,500-7,500 lbs carries that with zero meaningful impact on tow calculations. Weight is a real constraint for tent campers carrying a unit to a site. For travel trailer use, it is a non-issue.
Air conditioning changes the sizing math significantly. A roof-mounted RV AC draws 1,200-1,800W running and surges higher at startup. A 2000Wh battery gets through roughly 60-90 minutes of AC operation under that load, enough for a pre-sleep cool-down but not overnight cooling. If running the air conditioner from a solar generator is a priority for your trips, the guide on matching solar generators to specific RV situations covers the output specs and unit classes that handle it by scenario.

Featuring 16BB N-Type cells at 25% efficiency, this panel outperforms standard 200W panels and folds down to backpack size at just 13.89 lbs, with a magnetic closure for tool-free setup. Three built-in ports including USB-C PD 45W, and two USB-A ports charge devices directly, while MC4 output connects to most power stations and 12V battery systems. Four adjustable kickstands offer 40, 50, and 60 degree angles, and IP65 rating plus UL 61730 certification ensure durability and safety backed by a 2-year warranty.
Check On AmazonIf you click this link and buy, we earn a commission at no additional cost to you.
Getting the Most Out of Ground-Deployed Panels at a Campsite
Deploying portable panels effectively at a campsite is not complicated, but a few consistent habits make a real difference in how much solar you gain each day. Positioning is the most important one. A campsite tree that shades the trailer roof at noon may leave a patch of ground 10 feet south of the trailer in full sun for most of the afternoon. That is where the panels go. The portable setup follows the sun. The rooftop setup follows the trailer’s orientation, which you cannot change once you are backed in.
In my experience, the setup that works best for a two-panel 200W configuration is angling both panels toward where the sun will be at noon before leaving the campsite for the day. You will not be there to adjust them, so the fixed south-facing noon position captures the peak solar hours reliably. For foldable panels on a campground surface, a few medium-weight rocks on the lower edge of the panel frame prevents wind fallover during typical afternoon gusts. No extra hardware needed, and the panels stay put.
- Check your unit’s maximum solar input limit before buying panels. Every solar generator has a rated ceiling for how many watts of input it can accept and use. Adding panels beyond that ceiling does not speed up charging. A unit with a 400W maximum solar input accepts 400W of panels, and adding a third 200W panel produces no additional benefit past that cap. Check the spec sheet before purchasing panels.
- Leave panels deployed when you leave the campsite for the day. This is the travel trailer advantage in practice. The trailer stays, the panels stay, and the unit charges while you are gone. On a five-hour sunny day with 200W of panels, you gain back 700-900Wh without being there to manage anything.
- Connect the fridge to DC output before running anything else on AC. If your travel trailer has a 12V compressor fridge, run it from the DC port, not through the inverter. This cuts the fridge’s effective draw by 30-50% compared to AC operation and keeps the inverter idle, which reduces noise and heat as well.
- Angle panels toward the noon position when deploying, not toward where the sun is at that moment. Deploying panels at 8am and pointing them at the current sun position means they miss the peak solar hours between 10am and 2pm. Angle them toward the approximate south-facing noon position for the best average output across a full day without adjustments.
- Use a door-gap cable or a dedicated cable entry port to route the panel cable indoors. A cable entry port is a small weatherstripped fitting that passes a standard solar cable through a door or wall panel without significant air infiltration. They cost a few dollars and make the setup noticeably cleaner for a rig you use regularly.
One thing worth being direct about: the solar input ceiling on your unit is a hard limit, not a conservative suggestion from the manufacturer. I have talked to buyers who added a third 200W panel to a unit that accepted 400W maximum, expecting faster charging. The unit simply ignored the output above its rated cap. Match your panel wattage to your unit’s solar input spec. It is one of the most common and easily avoidable overspends in the solar generator market.

Starting at 2kWh and expandable to 6kWh with two additional batteries, this LFP station reaches 80% in just 43 minutes via combined AC and solar input. Its 3,000-cycle battery outlasts the industry average by 6 times and includes a 5-year service guarantee. With 2,400W output across 15 outlets and X-Boost pushing to 3,400W, it handles 99% of household appliances at a whisper-quiet 30 dB.
Check On AmazonIf you click this link and buy, we earn a commission at no additional cost to you.
Final Thoughts: The Setup That Works for Most Travel Trailer Owners
The practical travel trailer solar setup, for the use case that covers most owners, is a 1000-2000Wh portable unit with 200-400W of foldable ground panels. No roof penetrations, no permanent installation, no installation labor cost beyond the unit and the panels themselves. Charge from shore power when a pedestal is available, deploy the panels when it is not, and the setup handles a typical travel trailer trip without requiring much thought. For the weekend-to-extended-trip owner doing a handful of no-hookup nights per season, the portable approach covers the job well and does not overcommit you to hardware you may outgrow or want to swap.
Where this setup reaches its limits is in longer-duration off-grid use and daily air conditioning demand. Full-time RV living and consistent AC use push the Wh math into a different tier entirely, where battery capacity, solar input, and daily cycle wear all become more significant variables. For the owner whose use case is drifting in that direction, the sizing calculation changes, and eventually so does the type of system that makes financial sense. That is a different conversation from what most travel trailer owners are solving for on a weekend trip.

This 12-inch adapter lets you connect a 30-amp RV to a 15-amp power source, rated at 125 volts and 1,875 watts with 100% copper 10/3-gauge wiring for reliable conductivity. The flexible cord is wrapped in a weather-resistant, heat-resistant, and flame-retardant PVC jacket built to handle outdoor conditions. Ergonomic Power Grip handles and 90-degree connector heads make plugging and unplugging easy even in tight spaces. The adapter carries ETL certification to CSA and UL standards and features a patented design for added confidence.
Check On AmazonIf you click this link and buy, we earn a commission at no additional cost to you.
FAQs
🔌 Do I need an adapter to connect a solar generator to my travel trailer?
Yes. Most travel trailers use a TT-30P 30-amp shore power inlet. Solar generators output via standard 120V household-style plugs. A TT-30P adapter, typically $15-25 at any RV supply store, connects the solar generator output to the trailer’s inlet so power runs through the trailer’s internal wiring. Without it, you run extension cords directly to individual appliances inside the trailer.
🌤️ What size solar generator do I need for a travel trailer weekend trip without shore power?
For two nights running a 12V compressor fridge on DC output, LED lighting, and device charging for two people, a 1000-1500Wh unit covers the load with buffer. Add 200W of ground-deployed panels for daytime recharge and the setup stays net positive on a sunny weekend trip. If you plan to run a laptop and occasional small appliances, start at 1500Wh rather than 1000Wh.
🚐 Can I run my RV air conditioner on a portable solar generator?
For short periods, yes, with the right unit. A roof AC is possible only for short bursts. The running load usually sits in the 1,200-1,800W range, and startup surge is what decides whether the unit can handle it. A unit with 2000W or more continuous output and 4000W-plus surge capacity can start and run it. A 2000Wh battery lasts roughly 60-90 minutes under that load, which covers a pre-sleep cool-down but not all-night operation.
⚡ Is it better to run my travel trailer fridge on AC or DC from a solar generator?
DC, if your fridge accepts a 12V connection. Running the fridge through the inverter on AC adds 10-20% conversion loss and keeps the inverter drawing idle power all night. A 12V compressor fridge on DC typically draws 30-50W instead of 70-100W via the inverter. The DC connection is a no-cost efficiency gain that meaningfully extends overnight runtime from the same battery capacity.
🔋 Can I charge a solar generator while towing the trailer?
Through the 12V accessory outlet in the tow vehicle, yes, but the input rate is typically 60-100W, which barely moves the needle on a 1500Wh unit over a two-hour drive. It is useful for small top-offs on long travel days. Shore power at the campsite and deployed solar panels while the trailer is parked are the practical recharge methods for any unit above 500Wh.
📐 How much usable roof space does a travel trailer actually have for solar panels?
Less than most owners expect. After a rear AC unit, two to four roof vents, a TV antenna, and a plumbing vent, many 24-26 foot travel trailers have 40-60 usable square feet of south-facing roof. That is enough for 200-300W of rigid panels if the roof layout cooperates. If it does not, ground-deployed portable panels solve the same problem without any installation at all.