Buying It Right Is Only the First Step
The question of how to use a solar generator correctly is one I heard constantly at the shop. Buyers would spend weeks comparing watt-hours and battery chemistry, find the right unit for their situation, and then treat it like any other piece of electronics: plug it in, run it, charge it when empty, repeat. That habit works fine for a phone. It does not work particularly well for a lithium battery pack you have invested several hundred or several thousand dollars in.
What often determines whether a solar generator lasts closer to 3,000 cycles or 500 is how it is charged, how the panels are configured, how it is stored between uses, and how quickly problems are diagnosed before they compound. The specs printed on the box are tested under controlled conditions. Real-world use is not. Getting the operational habits right early is the practical difference between a unit that still performs well years from now and one that is showing noticeable degradation before the third year is out.
Field Note: One pattern I watched repeat more than any other: a buyer would come back six or eight months after a purchase saying the unit was not holding as much charge as it used to. After a few questions, it almost always traced back to one of two things. They had been storing it at 100 percent for months between uses, or they had run it down completely and left it sitting. Both habits accelerate capacity loss in a way that never shows up on the spec sheet when you buy it.
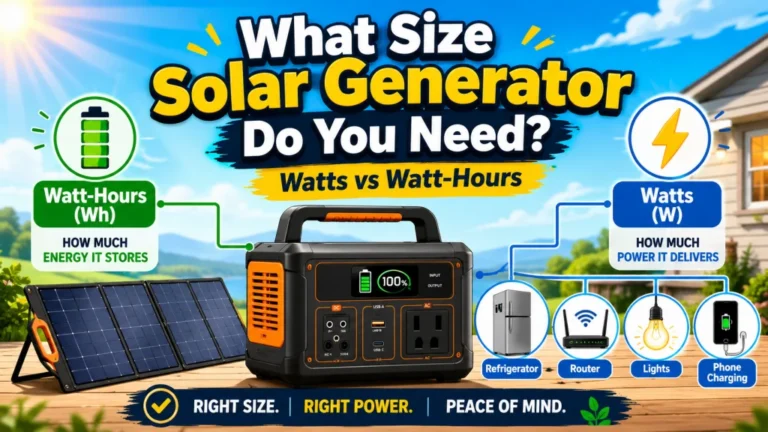
If you are still comparing units before buying, this solar generator beginner guide should shift what you look at. Watt-hours matter, but so does AC input speed, the MPPT voltage range the unit accepts, whether third-party panels connect cleanly, battery chemistry, and how clear the warranty and support path actually is. Those details determine day-to-day usability more than raw capacity numbers often do.
First-Use Quick Start: Before you rely on the unit for anything serious, run through this once. Check the battery percentage and inspect cables and ports for shipping damage. Charge to 100 percent to establish a baseline before first real use. Plug in a small device to confirm AC and DC outputs are working. Test at least one charging method before an outage or a trip. Then store the unit at 50 to 80 percent charge if you are not using it again soon.

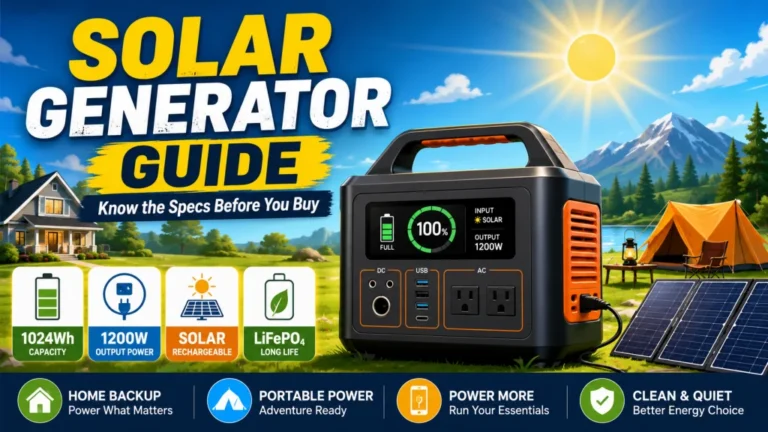
This 1kWh LFP battery station charges from 0 to 80% in just 50 minutes via AC input, and its LiFePO4 chemistry delivers a 3,000 plus cycle lifespan that is roughly 6 times longer than standard lithium batteries. Capacity is expandable up to 3kWh with additional batteries, making it well suited for camping, RVs, or off-grid living. Its 1,800W output powers across 15 outlets, handling around 90% of household appliances, and accepts up to 500W of solar input for clean, fuel-free charging. The package includes a 5-year customer service guarantee.
Check On AmazonIf you click this link and buy, we earn a commission at no additional cost to you.
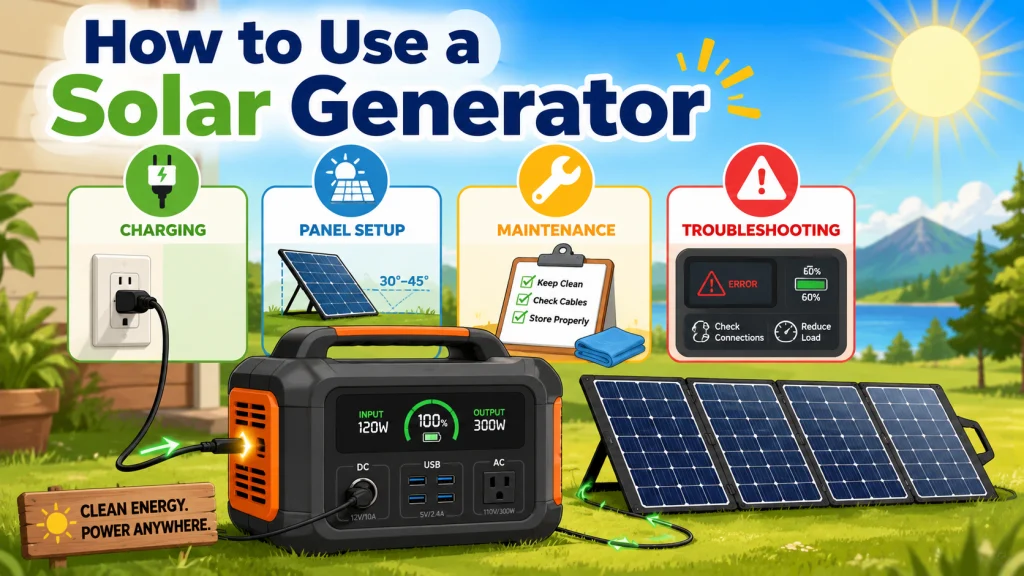
How to Charge a Solar Generator Correctly
A solar generator has three charging inputs: AC wall power, a 12V car outlet, and solar panels. They are not interchangeable for every situation. AC wall charging is the fastest method, typically restoring a mid-range unit from 0 to 80 percent in 2 to 4 hours. Car DC charging is the slowest, often limited to around 100 to 180W of usable input, which can mean 8 to 10 hours or longer to fully charge a 1,000Wh unit. Solar charging sits in the middle, but actual times vary significantly depending on panel wattage, your location, angle, shading, and whether the panels are matched correctly to the unit’s MPPT input range.
What to avoid is as important as knowing which method to use. Storing at full charge for extended periods keeps the cells under unnecessary voltage stress over time. Depleting to 0 percent and leaving it there risks putting the BMS into a protection state that can make the unit appear completely dead when you return to it weeks later. For LiFePO4 units, the storage sweet spot is 50 to 80 percent. The full breakdown of all three methods, real charging times by battery size, and the common mistakes that quietly shorten battery life are covered in the guide on how to charge a solar generator.
| Charging Method | Typical Input Range | Best Use Case |
|---|---|---|
| AC wall outlet | 300W to 1,000W+ | Pre-outage top-up, primary charging at home base |
| Solar panels | 100W to 800W+ (varies by setup) | Off-grid use, supplemental charging in the field |
| Car DC (12V outlet) | 100W to 180W | Topping up while driving, emergency backup |
The numbers above are typical ranges. Solar input in particular varies more than most buyers expect until they have run a few full cycles in their actual location and seen the results. The guide linked above goes into the specifics.
Setting Up Solar Panels the Right Way
Panel setup is where a significant number of owners leave performance on the table without realizing it. The two most common problems are partial shading and mismatched panel specs. Shading is not always obvious. A shadow across one corner of one panel during afternoon hours can reduce output across the entire array more than most people expect. Mismatched specs are a more serious issue: connecting panels that exceed the unit’s MPPT input voltage ceiling can damage the charge controller permanently, and the result is not always immediately visible until charging performance starts declining noticeably.
Placement angle is the third variable that consistently gets overlooked. A panel lying flat will rarely perform at its rated wattage in real conditions. In my experience, tilting a 200W panel toward the sun at roughly the right angle for the season can produce a meaningful difference in peak output compared to the same panel lying flat, especially in winter months when the sun sits lower. That gap compounds across a full day of charging. The full guide on connector types, voltage matching, panel orientation, and how to diagnose underperforming setups is at the solar generator panel setup guide.

Built with monocrystalline silicon cells at 21.5 to 23.5% conversion efficiency, this panel delivers 80 to 100W in full sunlight and still produces 65 to 70W on cloudy days. It folds down to 23 by 19.7 inches and weighs just 8.5 lbs, with an adjustable stand that tilts from 0 to 180 degrees to capture up to 25% more energy than flat-laying panels. Four output ports including USB-A, QC3.0, PD3.0 USB-C, and an 18V DC port let you charge up to four devices simultaneously, while a smart IC chip protects against overcharging and short circuits. The ETFE surface and IP68-rated oxford fabric body handle light rain and dust, and a 10-in-1 adapter set covers compatibility with Jackery, EcoFlow, Bluetti, DJI, and most other major solar generators.
Check On AmazonIf you click this link and buy, we earn a commission at no additional cost to you.
What Long-Term Maintenance Actually Requires
Solar generator maintenance gets overcomplicated in most guides, and it does not need to be. The practical list for a LiFePO4 unit is short: monitor storage charge level, avoid temperature extremes during storage, test the unit under a real load every few months if it sits unused, and keep the vents clear. There are no fluids, no filters, and no mechanical parts requiring scheduled service. The battery is the unit, and its longevity is shaped almost entirely by how it is charged, discharged, and stored over time.
Where owners run into trouble is usually temperature. A unit stored in a space that reaches extreme heat in summer, or left at 0 percent charge through a cold winter in an unheated garage, will show accelerated capacity loss over time. The unit will still work, but it will hold less charge than it used to, and that gap widens faster than it should. If your unit displays a cycle count, that number is worth tracking periodically as a simple health indicator. The specific maintenance steps and what the numbers actually mean are covered in the solar generator maintenance guide.
- Check and adjust storage charge level monthly if the unit is not in regular use.
- Store indoors or in a temperature-controlled space when not in use for extended periods.
- Test the unit under a real load for 15 to 20 minutes every few months during extended storage, then return it to the 50 to 80 percent storage range before putting it away again.
- Keep intake and exhaust vents clear of dust, debris, and obstructions.
- Inspect solar input cables and connectors periodically for wear, especially if panels are left outdoors.
That list covers most of what genuinely matters. The guide above goes into each point with enough detail to understand the reasoning behind it.
Troubleshooting When Something Goes Wrong
Most solar generator problems that owners report as failures are not failures. A unit that will not turn on is often a deeply discharged battery in BMS protection mode, not a dead main board. A unit that is not charging from solar is often a shading issue, a connector that was not fully seated, or panels wired outside the MPPT input range. A unit beeping during high-load operation is typically an overload alert, not an internal fault. A unit that runs out faster than it used to may have a phantom load from a device left plugged in, or an appliance whose real draw has increased as it has aged. These are generally owner-fixable situations with a known cause and a known diagnostic path.
The problems that require warranty service are less common but worth knowing. A BMS that fails after a hard short, a main board issue from an incomplete firmware update, or a unit whose runtime test shows results well below expected with relatively few battery cycles falls outside what an owner can fix. The useful distinction is that owner-fixable problems respond to a structured diagnostic approach, while warranty-level failures generally do not improve with any reset or recovery procedure.
The solar generator troubleshooting guide covers the most common failure patterns organized by symptom, with recovery steps for each. It is the right starting point whether the unit will not power on, is not charging from solar, is making unfamiliar sounds, or is not lasting as long as it used to.

This compact plug-in monitor tracks the energy consumption of any AC 115-volt appliance and displays real-time readings of volts, amps, and wattage at 0.2 to 2.0 percent accuracy. Its large LCD screen lets you calculate electricity costs by the day, week, month, or year, making it easy to spot energy-hungry devices and trim your utility bill. It is also compatible with inverters, adding flexibility for off-grid setups.
Check On AmazonIf you click this link and buy, we earn a commission at no additional cost to you.
Final Thoughts: The Operating Habits That Actually Matter
A solar generator is not a complicated machine to operate, but it rewards a handful of consistent habits. From what I have seen across retail sales and my own off-grid setup, the owners who get the most out of their units over time are the ones who understood the three charging methods early, set up their panels correctly the first time, stored the unit at an appropriate charge level when not in use, and knew how to read the early signs of a problem. Those habits account for most of the difference between a unit that still performs well after several years and one that is showing noticeable degradation before the third year is out.
None of it requires technical background. It requires knowing what to do and building the practice early. The guides in the table below cover each operational area in the detail this pillar does not. If something has changed in how your unit is behaving, one of them is the right place to start.

Sized at 32 by 24 by 25 cm, this storage bag is compatible with the Jackery Explorer 500, EcoFlow River and River Pro, Bluetti EB3A, GRECELL T500 and T1000, and EBL500. It is built from tear-resistant, waterproof material with a thick inner lining to guard against dust, scratches, and moisture, plus non-slip foot pads to keep it stable off the ground. Eight total pockets including a main compartment, top mesh pocket, two side pockets, and a front pocket with four interior organizers keep cables, adapters, and accessories neatly sorted. Padded handles and a removable shoulder strap make it comfortable to carry on camping trips, picnics, or travel.
Check On AmazonIf you click this link and buy, we earn a commission at no additional cost to you.
Guides in This Series
Each operational area covered here has its own dedicated resource. These are the right places to go when you need the full picture on a specific topic or are working through an issue.
| Guide | What It Covers |
|---|---|
| How to Charge a Solar Generator | All three charging methods with real times by battery size, storage charge recommendations, and the habits that shorten battery life prematurely |
| Solar Generator Panel Setup | Panel compatibility, MPPT voltage matching, MC4 wiring, optimal tilt angle by season, and diagnosing underperforming panel output |
| Solar Generator Maintenance | Storage charge levels, temperature limits, cycle count tracking, and the short list of tasks that actually require attention |
| Solar Generator Troubleshooting | Symptom-by-symptom diagnosis for the most common owner-reported problems, with recovery steps and the line between owner-fixable and warranty territory |
FAQs
⚡ Do I need to fully charge a solar generator before first use?
Most manufacturers recommend it, and it is a good habit. Units typically ship at 30 to 50 percent charge. Charging to 100 percent before first use establishes a baseline so you know what full capacity looks and reads like on the display going forward.
🔋 What charge level should I store a solar generator at?
For LiFePO4 units, 50 to 80 percent is the recommended range. Storing at 100 percent for extended periods keeps the cells under unnecessary voltage stress. Storing at 0 percent risks triggering BMS deep discharge protection, which can make the unit appear unresponsive when you return to it. Check the charge level monthly during storage and top it up if it has dropped below 40 percent.
☀️ Can I run appliances while the unit charges from solar panels?
Yes. Most current solar generators support pass-through charging, meaning you can run a load while the unit charges simultaneously. Whether battery level rises or falls depends on whether the load draw exceeds the charging input. If you are pulling 300W while receiving 150W from panels, the battery will drain, just more slowly than without the panels connected.
🌡️ Does cold weather affect how a solar generator works?
Yes, more than most owners expect. LiFePO4 batteries below 32°F will not accept a charge on most units because the BMS blocks it to prevent cell damage at low temperatures. Usable capacity also drops temporarily in cold conditions. Let the unit warm to room temperature before charging or running loads after cold storage.
🔌 How do I know if my solar panels are compatible with my unit?
Check the unit’s MPPT input specifications: maximum open-circuit voltage (Voc), maximum current, and maximum wattage. Your panels’ open-circuit voltage must stay below the unit’s Voc ceiling. Exceeding it can permanently damage the charge controller. Most units use MC4 connectors as standard, but voltage and wattage limits vary significantly between models, so match specs before connecting anything.
🔧 How often does a solar generator actually need maintenance?
Rarely, by most standards. LiFePO4 units have no fluids, no filters, and no mechanical parts that require scheduled service. The main tasks are monitoring storage charge level, keeping vents clear, and testing the unit under a real load every few months if it sits unused for an extended period. That covers the majority of what genuinely matters for long-term performance.