The Two Maintenance Tasks Most Owners Never Get To
Solar generator firmware updates and port maintenance do not appear in any quick-start guide, and many printed manuals barely explain either one in practical maintenance terms. If you have been working through the maintenance side of ownership, you have likely come across battery storage protocols, charge level management, and panel care. What almost never makes it into any guide is the software layer controlling how the battery management system behaves, or the physical condition of the ports and connectors the unit depends on every single time you use it.
I say this from experience. Customers would come into the shop with units that were cutting off under load, charging oddly, or throwing intermittent errors. The first question I started asking was whether they had checked for a firmware update and when they had last looked at their connectors. Not always the cause. But often enough that both checks became part of the first conversation. Neither task is technically demanding. They just require knowing these maintenance items exist in the first place.
What Firmware Updates Actually Fix
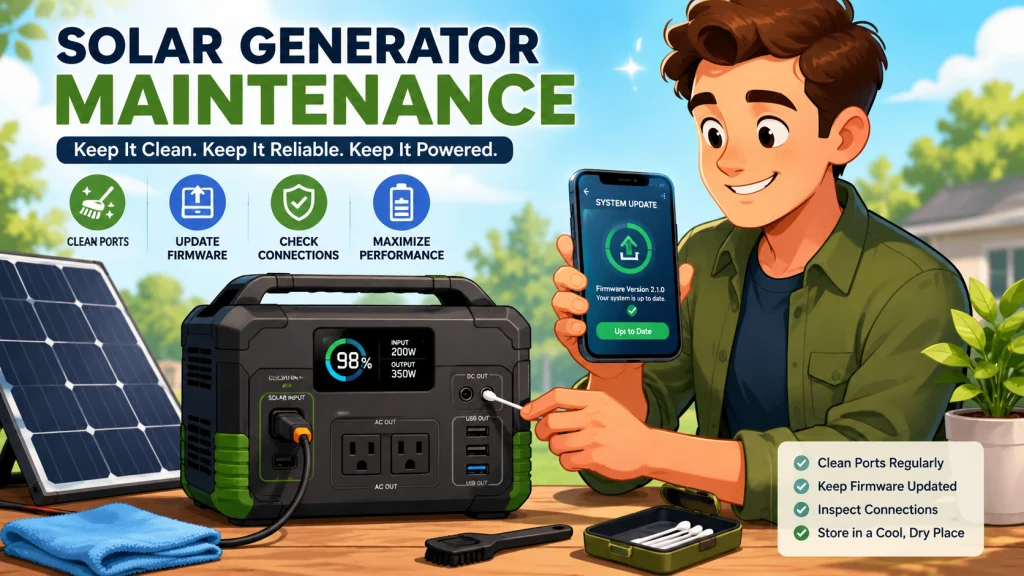
A firmware update is a software change pushed to the internal processor that controls your unit’s battery management system, charging behavior, temperature response, and app communication. This is not cosmetic. BMS charging thresholds, MPPT behavior, protection cutoffs, and error recovery logic are all governed by firmware. Manufacturers push updates to address real problems that surface after units reach the field, not problems they invented for a marketing announcement.
The clearest example of why this matters: in late 2025, owners of a specific Anker Solix model started reporting that the unit would drop its WiFi connection after a full discharge followed by a solar recharge cycle. This was a documented firmware bug tied to how the BMS and wireless module interacted after that particular sequence. Some owners avoided or resolved the issue after applying the relevant update. Owners who never checked the app kept running into the same problem with no clear explanation.
Beyond specific bug fixes, firmware updates can also improve charging behavior, refine BMS thresholds in ways that reduce cycle stress on the battery over time, and occasionally activate hardware capability that was disabled at the time of manufacture. The improvement from any single update may be modest. The effect of staying current across several years of ownership adds up in ways that matter when you are asking a battery to hold up through its fifth or sixth year of outage seasons.
Field Note: At the shop, one pattern I noticed was that owners who came in with battery management errors or units that cut off unexpectedly under load were often running firmware that was one or two versions behind. Not every time, but consistently enough that checking firmware became the first diagnostic step before we looked at anything else.
How to Check for and Apply Firmware Updates
The process is consistent across the major app-connected solar generator brands. Open the manufacturer app, connect to the unit via Bluetooth, and navigate to device settings or device info. Current firmware version and any available update will appear in that section. EcoFlow units often surface update notifications when you open the app directly. Jackery units update through the Jackery app. Anker Solix units use the Anker app. All three connect over Bluetooth first, then pull the update file over the unit’s WiFi connection for units with a wireless module. For Bluetooth-only units, the update is downloaded to the phone and pushed over the Bluetooth link directly.
A few things to get right before you start an update:
- The unit should be above 50 percent charge before starting. If the battery drops to a low state mid-update, the process may not complete cleanly and the unit may enter an unresponsive state that requires a hard reset.
- If possible, connect to AC wall power during the update so charge level stays stable throughout the process.
- Do not perform updates during or immediately before an expected power outage. A grid failure mid-update does not leave the process in a good state.
- Leave the app open and your phone screen on until the update confirms completion. Force-closing the app mid-process interrupts it.
- After the update, the unit reboots automatically. Wait for it to restart fully before connecting any load or solar input.
The update itself takes between 5 and 15 minutes depending on the unit and the size of the patch. A unit that has not been updated across multiple versions may take longer. If the progress indicator appears stalled past 20 minutes with no movement, close and reopen the app to check status before assuming a failure.
When to Update Immediately and When to Wait
Not every update needs to go on immediately. Update right away if the release notes mention a bug fix related to charging, BMS behavior, app connectivity, WiFi or Bluetooth stability, temperature protection, or error recovery. Those are operational fixes that affect how the unit behaves on the job. If the unit is working well and you are days away from storm season or a camping trip, wait until after you have used it, then update and run a quick function test: activate AC output, plug in a small load, connect solar input if you have panels available, and confirm the app is reading battery level, input, and output correctly.
This also means you should not treat firmware as “more is always better” without any thought. An update that changes BMS behavior may alter how the unit handles edge cases. For most owners most of the time, staying current is the right call. The caveat is timing: update a few days before you need the unit, not the night before a predicted outage.

This plug-in power monitor displays eight units of measurement on a large LCD screen and tracks your appliance's energy consumption with accuracy within 0.2%. It calculates and forecasts electricity costs by week, month, and year, making it easy to spot energy-hungry devices and plan your budget. Built-in memory retains accumulated data even when unplugged, so your usage history is always preserved.
Check On AmazonIf you click this link and buy, we earn a commission at no additional cost to you.
Port and Connector Maintenance
Solar input ports and DC output ports on a portable solar generator collect debris every time the unit is used outdoors. Grit, fine sand, and oxidation build up on MC4 connector pins, DC barrel jack contacts, and the main solar input port housing over time, particularly for units used at campsites, in vehicles, or in dusty and sandy environments. The accumulation is slow enough that most owners never notice it until a charging problem appears.
Dirty or oxidized connections increase electrical resistance at the contact point. Higher resistance means more heat generated at the junction and less efficient energy transfer, which shows up in practice as lower-than-expected charging input from your solar panels. A connection that intermittently loses contact produces 0W solar input readings that look like a panel or cable failure but are actually a mechanical issue at the connector itself, and are easily missed without a physical inspection.
Cleaning it takes only a dry cotton swab or a short burst of compressed air in the solar input port and the DC jacks on the unit. For MC4 connectors on your solar cables, inspect the metal pins for green tinting or dark discoloration, both signs of oxidation, and wipe gently with a clean dry cloth. Never insert anything metallic into a port while the unit is powered on or while a solar panel is connected to the other end of the cable. Disconnect the panel first, then inspect and clean.
Check the XT60i or 8mm barrel connector at the unit end of the solar cable at the same time, whichever type your unit uses. These accumulate the same debris as the MC4 end. A visual check and a quick wipe takes about two minutes per cable and catches issues before they turn into a dead charging session you are trying to diagnose in the dark.
USB-A and USB-C ports on the unit are worth a look at the same interval. These ports pick up lint, fine grit, and pocket debris more easily than any other port on the unit, and a partially blocked USB-C port can cause intermittent connection failures with devices that otherwise charge fine on a different cable. Use a short burst of compressed air at the port opening to clear loose debris. Do not insert anything metallic or abrasive. If the port has visible discoloration or the connection feels loose, contact the manufacturer before continuing to use that port under load.

These 12-ounce compressed air cans blast dust, lint, and debris out of hard-to-reach areas like CPU fans, keyboards, computer mice, and workstations, and work equally well on collectibles, figurines, and window blinds. The formula is 100% ozone safe with no CFCs, HCFCs, propane, or butane. Each can includes an extension straw for precise targeting in tight spaces.
Check On AmazonIf you click this link and buy, we earn a commission at no additional cost to you.
The AC Outlet Check
Most portable solar generators cover their AC outlets with plastic covers or rubber flaps that keep debris out during storage and outdoor use. These covers solve one problem and create another: if the unit is stored while damp from condensation or outdoor use, moisture gets trapped inside the outlet housing against the contacts. This is not a common failure mode for units kept indoors, but it is a real one for units that spend time in vehicles, tool sheds, or garages where temperature and humidity swing.
The check itself is simple. With the unit powered completely off, use a dry cotton swab to clean inside each AC outlet. Look for discoloration, visible debris, or any sign of moisture residue. Use a dry swab or compressed air only, not your breath, since blowing into the outlet adds moisture rather than removing it. If you stored the unit after a rainy camping trip or packed it away before it had time to dry out from a humid outage, this check is worth doing before the next use.
How Often to Do Both
For most owners, twice a year is the right baseline: once before storm season and once before winter. That timing lines up naturally with the pre-season charge checks most owners already do, so it takes no extra scheduling. Add the firmware check and the connector inspection to that same session and both tasks are done in under 30 minutes across the whole year. If you use the unit heavily outdoors in dusty or sandy conditions, run the connector and port check quarterly or after every few outdoor sessions. Twice a year is right for home backup and light use. Quarterly is right if the unit lives in a vehicle, travels to multiple campsites per season, or regularly gets used in environments with significant dust or grit.
| Task | Recommended Frequency | What You Need |
|---|---|---|
| Firmware update check | Twice a year (quarterly for frequent outdoor use) | Manufacturer app, Bluetooth connection |
| Solar input port inspection | Twice a year (every few sessions for outdoor use) | Visual inspection, dry cotton swab or compressed air |
| MC4 and DC cable connector check | Twice a year (every few sessions for outdoor use) | Visual inspection, clean dry cloth |
| USB-A and USB-C port check | Twice a year, or when a device fails to connect | Compressed air, visual inspection |
| AC outlet inspection | Twice a year, or before storage after outdoor use | Dry cotton swab, compressed air |
Both tasks fit naturally into the same pre-season session covered in the full solar generator maintenance guide, which includes battery care, storage protocols, and the complete maintenance routine for long-term ownership. Combining firmware and port checks into that same session means the entire maintenance picture gets handled in one pass, rather than remembered and rescheduled separately later.

This 1kWh LFP battery station charges from 0 to 80% in just 50 minutes via AC input, and its LiFePO4 chemistry delivers a 3,000 plus cycle lifespan that is roughly 6 times longer than standard lithium batteries. Capacity is expandable up to 3kWh with additional batteries, making it well suited for camping, RVs, or off-grid living. Its 1,800W output powers across 15 outlets, handling around 90% of household appliances, and accepts up to 500W of solar input for clean, fuel-free charging. The package includes a 5-year customer service guarantee.
Check On AmazonIf you click this link and buy, we earn a commission at no additional cost to you.
Final Thoughts: The Maintenance Items Worth Knowing About
Most solar generator maintenance is visible: charge it correctly, store it at the right level, clean the panels. Firmware updates and port maintenance are invisible, which is exactly why almost no one does them. The unit runs software that can be improved after purchase and relies on connectors that take steady outdoor abuse. Both are worth twice a year, and neither requires more than a cotton swab and a phone.
One thing worth noting for anyone still evaluating units: a manufacturer that actively pushes firmware updates, maintains a functional app for BMS diagnostics, and designs a port layout that is easy to inspect is offering a meaningfully different ownership experience than one that does not. That is not a flashy spec but it matters in year three and year four when the original warranty is gone and you are relying on what is in the unit itself.
If you are working through the full operational picture from first charge through long-term ownership, the guide at how to use a solar generator covers charging methods, panel setup, and the full owner-fixable versus warranty-service triage. Firmware issues and connector maintenance sit firmly on the owner-fixable side of that line.

Built with N-Type cells at 25% conversion efficiency, this 15.9 lb foldable panel includes a 30 to 60 degree adjustable bracket with an integrated angle guide for optimal sun tracking throughout the day. ETFE coating and an IP68 waterproof rating ensure durability in harsh weather, and the included protective bag makes transport straightforward for camping, trekking, or road trips.
Check On AmazonIf you click this link and buy, we earn a commission at no additional cost to you.
FAQs
💡 Can I use my solar generator while a firmware update is in progress?
No. The unit’s processor is being written to during the update, and connecting or disconnecting loads, losing power, or force-closing the app mid-process can corrupt it. Keep the unit on AC power and leave it alone until the update confirms it is complete and the unit has rebooted.
🔄 What happens if a firmware update fails partway through?
Depending on the manufacturer’s implementation, the unit may attempt to fall back to the previous firmware version if the update fails to complete. If the unit becomes unresponsive after a failed update, try a hard reset by holding the power button for 10 to 15 seconds. If that does not restore normal operation, contact the manufacturer’s warranty support with the firmware version you were updating from and to.
🔍 How do I know if my MC4 connector pins have oxidation?
Look for a greenish tint, dark discoloration, or a dull rough texture on the metal pin surfaces. Clean metal looks bright and smooth. Oxidized metal looks dull or discolored. Wipe the pin gently with a clean dry cloth before reconnecting. If the discoloration is heavy, inspect the female socket end of the connector as well.
🏠 How often should I check ports if I mostly use the unit for indoor home backup?
For indoor use with occasional solar charging, a once-per-season visual check is more than adequate. Indoor units accumulate far less grit than units used regularly outdoors. The firmware check at the same interval covers both tasks in one short session.
🔋 Do firmware updates actually improve battery cycle life?
Some do. Manufacturers occasionally push BMS updates that refine charging cutoff voltages and temperature response logic, which reduces cumulative stress on the battery cells over time. The improvement from any single update is not large, but staying current across several years of ownership adds up in meaningful ways.
💨 Is compressed air safe for cleaning ports on a solar generator?
Yes, with a couple of precautions. Use short bursts rather than prolonged pressure, and hold the can upright to prevent propellant from discharging inside the port. Do not insert the nozzle directly into the port housing. The goal is to dislodge loose debris, not blast it further inside.