Solar Generator Panel Connectors: The Gap Nobody Mentions at Checkout
The solar panel has two wires coming out of it. The solar generator has an input port on the side. Getting those two things talking to each other is the first real task of solar generator ownership, and it is the one that catches the most people off guard. Not because it is complicated, but because the connector types are almost never the same out of the box, and nobody tells you that at the point of purchase.
I watched this play out at the counter more times than I can count. Someone would spend weeks comparing watt-hours and inverter ratings, make a solid purchase decision, and then call back three days later asking why their panel was not doing anything. The answer, almost every time, was a connector mismatch. The panel was fine. The unit was fine. They just needed an adapter cable and had no idea one was required. Understanding solar panel connector compatibility before your equipment arrives saves that exact frustration.
The fix is straightforward once you know what you are working with. The goal of this article is to get you to that point before you need it.
The Four Connector Types You Will Encounter
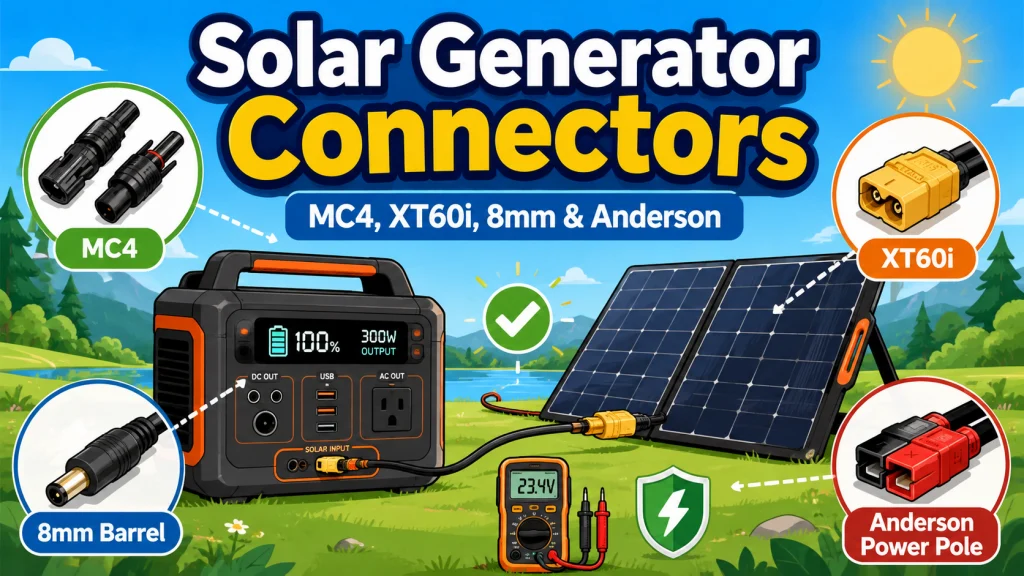
Solar generator panel connector types come down to four main formats in the portable solar world. The panel side is almost always the same. The unit side is where things vary.
| Connector Type | Where You Find It | What It Looks Like | Adapter Needed for MC4 Panel? |
|---|---|---|---|
| MC4 | Output end of almost all solar panels | Round, locking, weatherproof, one male and one female per cable pair | No. This is the standard panel output connector. |
| XT60i | Solar input port on many popular mid-range and large units | Two-pin keyed connector, gold-plated contacts, secure friction-fit housing. Not a barrel plug. | Yes. MC4-to-XT60i adapter cable required. |
| 8mm barrel | Solar input on several widely used units, especially older models | Round barrel plug, 8mm diameter, no locking mechanism | Yes. MC4-to-8mm adapter cable required. |
| Anderson Power Pole | Older units, some higher-capacity units, DIY builds | Red rectangular snap-together connectors, two pieces that click together | Yes. MC4-to-Anderson adapter cable required. |
MC4 is the industry standard for solar panel output. Round, weatherproof, click-locking connectors, one male and one female, often paired with red-positive and black-negative lead markings. They require a specific removal tool to disconnect cleanly, which is worth knowing before you try to yank one apart by hand. Virtually every third-party solar panel on the market today ships with MC4 connectors.
The XT60i is a two-pin keyed connector with gold-plated contacts and a secure friction-fit housing. It is not a barrel-style connector and should not be confused with the 8mm barrel plug described below. The XT60i variant adds an extra signal pin compared to the standard XT60, which is why the two are not interchangeable even though they look similar at a glance. It is used as the solar input port on a wide range of popular units in the mid-range and larger capacity brackets. If your unit has an XT60i port and your panel outputs MC4, you need an MC4-to-XT60i adapter cable. This is the most common adapter purchase in the portable solar space by a significant margin.
The 8mm barrel connector is a round plug roughly 8mm in diameter without a locking mechanism. It appears on a large number of units across several brands, particularly older model lines. Some current units still use this format. If your solar input port is a simple round barrel port and nothing clicks into it, this is likely what you have.
Anderson Power Pole connectors show up on older units and some higher-capacity portable power stations. They are common in DIY and off-grid battery builds, so if you have been in that world you will recognize them immediately. Adapters exist but they are less commonly stocked than the XT60i or 8mm options.

Built with 12AWG pure copper wire and anti-spark XT60i connectors, this cable supports up to 30A for fast, low-loss solar charging across 12V and 48V systems. IP67-rated waterproof connectors with reinforced silicone seals and dual-layer PVC insulation rated to 105 degrees Celsius ensure reliable outdoor performance. Color-coded red and black cables make polarity clear, with broad compatibility covering EcoFlow, Jackery, Goal Zero, and Renogy.
Check On AmazonIf you click this link and buy, we earn a commission at no additional cost to you.
The Voltage Check You Have to Do Before Connecting Anything
Here is the part that matters more than which adapter cable you buy. A connector physically fitting does not mean the connection is electrically safe. Voltage compatibility is a separate check, and getting it wrong can damage the charge controller in your unit permanently.
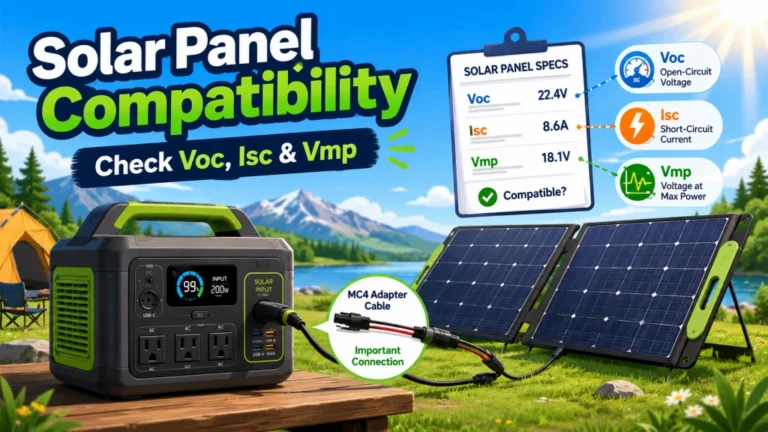
Every solar generator has a maximum solar input voltage listed in its specifications. This is usually labeled “Max. PV Input Voltage” or “Solar Input Voltage” in the spec sheet. Every solar panel has an Open Circuit Voltage (Voc) listed on its specification label, typically on the back of the panel. The panel’s Voc must be lower than the unit’s maximum input voltage before you connect them.
A concrete example: a 200W panel with a Voc of 24V connects safely to a unit with a 60V maximum input. That same panel would also be fine on a unit with a 30V maximum. But if you connect two of those 200W panels in series, the combined Voc becomes roughly 48V, which exceeds that 30V maximum and will damage the charge controller. The connector still fits. The unit still looks like it accepts the connection. The damage happens invisibly until the MPPT controller fails.
- Check your unit’s maximum solar input voltage in the spec sheet before buying panels or adapter cables.
- Check your panel’s Open Circuit Voltage (Voc) on the specification label on the back of the panel.
- Confirm the Voc is lower than the unit’s maximum, with margin, before connecting.
- If you plan to add a second panel in series later, calculate the combined Voc of both panels before doing so.
The current check matters less in single-panel setups but is worth confirming: your panel’s Short Circuit Current (Isc) should not exceed the unit’s maximum solar input current. For most standard panel and unit pairings this is not the binding constraint, but it becomes relevant when connecting multiple panels in parallel. Both numbers are in the same place: the spec sheet for your unit and the label on your panel.
Key point: Solar panel connector compatibility means both physical fit and voltage match. A cable adapter handles the physical fit. The voltage check is on you.
How to Identify the Connector Types You Have
Start with the unit. The solar input port is usually on the side or back panel, sometimes behind a rubber dust cover. Most units ship with a short adapter cable already attached to that port, which makes identification easy. If yours came with one, look at the free end of that cable to confirm the type. The owner’s manual will list the connector format by name, usually in the charging specifications section.
If the port is bare, look at its shape. An XT60i port has a keyed two-pin shape with metal contacts inside and a housing that only fits one orientation. An 8mm port is a simple round hole with no locking feature. Anderson connectors are unmistakable, two flat rectangular faces that snap together. If you are still unsure, a quick search for your unit’s model number combined with “solar input connector type” will surface the answer from the owner’s manual PDF or a product forum within seconds.
Field Note: The most avoidable situation I saw repeat itself at the counter was someone who ordered panels to ship separately from their unit, waited several days for delivery, and only when both arrived realized they had no adapter cable. The unit was charged and ready. The panels were outside. Nothing was going anywhere for another week. Checking the solar input connector on your unit before you order panels takes two minutes. It is the kind of detail that is easy to miss when you are focused on capacity specs and pricing, but it is worth checking first.
On the panel side, if you are working with any standard third-party panel, you almost certainly have MC4. The connectors are round, weatherproof, and have a distinct click-and-lock design. One cable from the panel is the positive lead with a male MC4 connector, the other is the negative lead with a female MC4 connector. That is the most identifiable connector in portable solar, and once you have seen it once you will recognize it on any panel.
From there, the path is straightforward: look up the correct adapter cable for your unit’s input port to MC4, verify the voltage is within range, and order it before the panels arrive. The full context on this and everything else involved in the solar generator panel setup process goes into the wiring configurations and placement decisions that come after you have the right cables in hand.

Built with A-grade monocrystalline cells at 23% conversion efficiency, this IP65-rated panel handles all weather conditions and includes 10 connector sizes for compatibility with Jackery, EcoFlow, Bluetti, Anker, Goal Zero, and most other major solar generators. An 18W USB-A QC3.0 and 18W USB-C port charge devices directly, and two panels can be run in parallel for faster station charging. The 1,200D Oxford cloth build and foldable handle make it easy to hang, carry, or mount on a car roof.
Check On AmazonIf you click this link and buy, we earn a commission at no additional cost to you.
What to Photograph Before You Buy an Adapter Cable
The most common reason people buy the wrong adapter cable is that they order from memory or from a listing that names a brand but not a model. Four photographs taken before you open the product listing page will prevent that.
Take a photo of the solar input port on your unit, with any dust cover removed and the port clearly visible. Take a photo of the spec sheet label on your unit showing the solar input specifications, specifically the maximum PV input voltage and maximum input current rows. Take a photo of the specification label on the back of your panel showing Voc, Isc, and Vmp. If you already have an adapter cable that is not working, photograph both ends of it.
Those four images answer every question that comes up during the cable selection process. They also give you everything you need if you end up posting in a forum or contacting support. Model numbers alone are not always enough because connector formats have changed across production runs within the same model name. The physical port is the ground truth.
Pro Tips: Before checkout, confirm that the cable listing names your exact unit model (not just the brand), specifies XT60i and not just XT60 if that is what your unit uses, and lists the wire gauge and voltage/current rating. A listing that only names a brand and says “8mm compatible” is not specific enough to trust for first-time use.
The Proprietary Connector Trap
Some manufacturers use input connector formats that look like a standard type but are not interchangeable with it. This is the issue that hits owners who have adapter cables from an older unit, or who purchase a generic cable labeled as compatible without verifying it against their exact model.
A real example of this is the difference between the DC7909 and DC8020 connector formats used on some 8mm-style units. Both are casually called “8mm connectors” in product listings and forum posts. They are not the same. The DC7909 has a 7.9mm outer diameter and a 5.5mm inner pin. The DC8020 has an 8.0mm outer diameter and a 2.0mm inner pin. Both look nearly identical at a glance, particularly in a photo. An adapter cable built for one does not fit the other, and if it almost fits, it will not make reliable contact even if it appears to seat. Owners who buy a “Jackery-compatible 8mm cable” without specifying the connector format often end up with zero solar input and no obvious reason why.
Beyond the DC7909/DC8020 issue, some manufacturers updated their proprietary format entirely on 2024 and 2025 model lines. An older kit cable that worked on a previous unit from the same brand may not physically fit a new unit from the same brand. The connector label stayed the same. The physical format did not.
If you own a unit produced in 2024 or 2025 and are using cables from a previous generation, or cables from a third-party listing that specifies only a brand name and not an exact model number: verify compatibility against your specific unit’s model number before purchasing. Connector type names and brand names are not enough. Model number confirmation is the only reliable check.
The Polarity Reversal Risk With Third-Party Adapter Cables
This is the failure mode that generates the most confused troubleshooting calls, because the symptom looks identical to a dead panel or a broken input port.
Some third-party MC4-to-XT60i adapter cables are manufactured with the polarity wired incorrectly. Positive and negative are swapped at the unit end. When you connect one of these, the unit reads zero watts of solar input. There is no error message in most cases. Just zero. The cable looks correct. The sun is out. Nothing is moving. The input protection circuit is doing exactly what it should, blocking current when polarity is reversed, but the symptom is indistinguishable from a cable that is not seated properly or a panel that is fully shaded.
Warning: Before connecting any adapter cable from an unfamiliar or unverified source, check polarity with a multimeter. Set to DC voltage, put the probes on the output end of the adapter cable with the panel in sunlight, and confirm a positive reading. A negative reading means the cable is wired with reversed polarity. Do not use it.
Cables from sources with confirmed compatibility documentation for your specific unit are worth the extra cost over the cheapest available option. A reversed polarity cable produces hours of troubleshooting before anyone figures out what is actually wrong, and in a situation where you are depending on solar charging, that delay is not small. This risk is specific to third-party MC4-to-proprietary-format adapter cables, not to standard MC4 panel connections, and it is easily avoided by testing before first use.
Worth noting: if you have already connected a suspected reversed-polarity cable and the unit read zero watts but nothing else happened, the input protection circuit likely did its job. Disconnect the cable, test polarity, and replace it if the polarity is incorrect. Most units recover without issue after a reversed polarity connection is disconnected.

This 1,999-count multimeter measures AC/DC voltage, DC current, resistance, and diode, with a 2-per-second sampling rate and backlit LCD for use in low-light conditions. Double-fuse overload protection and a silicone outer cover guard against electrical damage and drops. Data hold, auto shutoff, and a continuity buzzer round out a practical feature set for household, automotive, and industrial troubleshooting.
Check On AmazonIf you click this link and buy, we earn a commission at no additional cost to you.
Final Thoughts: The Pre-Flight List Before You Connect
Connector problems are the most fixable problems in solar generator setup. A wrong cable is a cable swap. A wrong voltage is a damaged charge controller. Those two outcomes are not equivalent, which is why the order matters: do the voltage check first, then confirm the connector, then test polarity on any third-party adapter before the first real connection.
The short checklist, in order:
- Confirm your unit’s solar input connector type from the spec sheet or physical port.
- Check that your panel’s Voc is below your unit’s maximum solar input voltage.
- Order the correct adapter cable and confirm it names your exact unit model, not just a brand.
- For 8mm-format cables, confirm whether your unit uses DC7909 or DC8020 before purchasing.
- Test polarity on any third-party adapter with a multimeter before first connection.
That is genuinely the whole job. Five steps, done once before the panels arrive, and the first time you connect a panel to your unit it will either charge or give you a specific error that points directly at the real cause. If you are building out the rest of the setup from here, the guide on how to use a solar generator covers what comes next, from first charge through long-term ownership.

Weighing just 23.8 lbs with a foldable handle, this 1,070Wh LFP power station delivers 1,500W of pure sine wave AC output with a 3,000W surge capacity, capable of running AC units, fridges, and electric pots. Its LFP battery sustains over 70% capacity after 4,000 cycles, translating to a lifespan of more than 10 years. Via the Jackery App, you can enable a full charge in as little as one hour, or switch to a whisper-quiet 30 dB overnight mode. Six output ports including two USB-C with 100W PD charging cover nearly any device simultaneously.
Check On AmazonIf you click this link and buy, we earn a commission at no additional cost to you.
FAQs
🔌 What connector type does my solar generator use for the solar input port?
Check the spec sheet for your specific unit or look at the solar input port physically. The four main formats are XT60i (two-pin keyed connector with gold-plated contacts, not a barrel plug), 8mm barrel (simple round barrel plug, no locking), Anderson Power Pole (rectangular snap connectors), and MC4 (standard panel output connector, rarely used on unit inputs). Your owner’s manual will list the type by name in the charging specifications section.
⚡ Do I need to check voltage before connecting a solar panel to my unit?
Yes, and this is the one check that matters most. Confirm that your panel’s Open Circuit Voltage (Voc) is lower than your unit’s maximum solar input voltage before connecting. A connector physically fitting does not mean the voltage is within safe range. Exceeding the maximum input voltage can permanently damage the charge controller.
🔄 How do I check if my MC4 adapter cable has reversed polarity?
Use a multimeter set to DC voltage. Put the probes on the unit-end of the adapter cable with the panel in direct sunlight. A positive reading means polarity is correct. A negative reading means the cable is wired with positive and negative swapped and should not be used. A reversed polarity cable causes the unit to read zero watts with no other error indication.
🔧 Can I use a third-party MC4-to-XT60i cable with any solar generator that has an XT60i port?
In most cases yes, but verify two things first: the cable is rated for the voltage and current your panel produces, and the polarity is correctly wired. Third-party adapter cables from unverified sources occasionally have polarity reversed, causing a zero-watt reading on connection. Test with a multimeter before first use.
🛠️ My solar panel connector does not fit my unit’s port even though the specs say it should. What is the issue?
Some manufacturers updated their proprietary connector formats on newer model units while keeping similar-looking connectors on older models. An adapter cable labeled as compatible with a brand may not fit a 2024 or 2025 unit if it was designed for an older generation. Verify compatibility using your exact model number, not just the brand or connector type name.
📐 What happens if my panel voltage exceeds my solar generator’s maximum input voltage?
In most cases the charge controller’s input protection will block the charge and the unit will show zero watts or an error code. In some cases the charge controller can be damaged permanently. Either way, the connection should not be made. Check the Voc on your panel’s specification label against the maximum input voltage in your unit’s spec sheet before connecting.