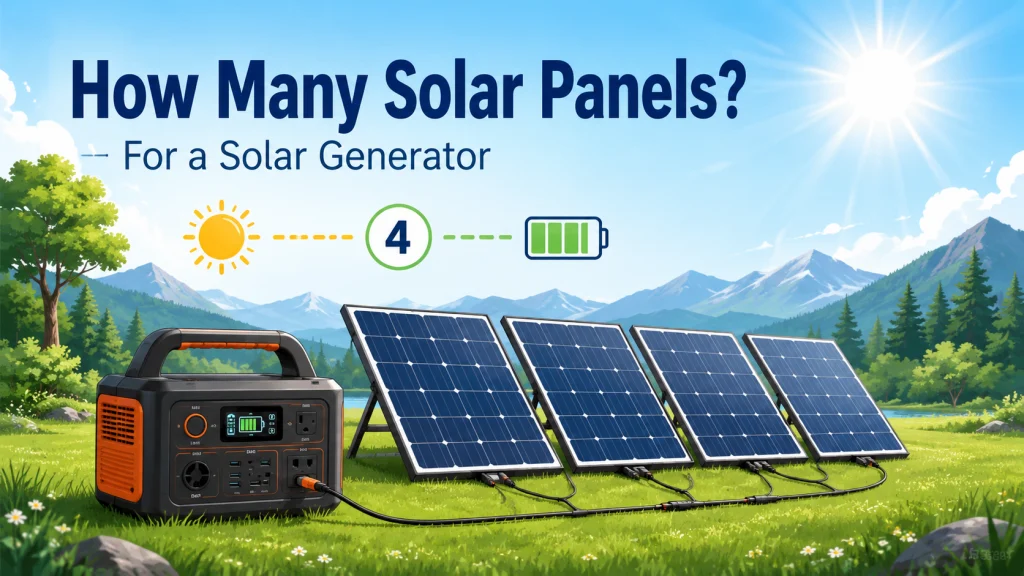
The Base Formula: Battery Capacity Divided by Peak Sun Hours
The starting point for panel sizing is straightforward. Take your battery capacity in watt-hours and divide it by the number of peak sun hours your location receives on an average day during the season you plan to use the system. The result is the panel wattage needed to fully recharge your battery from empty in a single good sun day.
Peak sun hours are not the same as daylight hours. A location that gets twelve hours of daylight in summer may have only five or six peak sun hours, which is the number of hours where sunlight intensity is sufficient to produce rated panel output. The National Renewable Energy Laboratory publishes peak sun hour data by zip code, and the range across the continental US runs from approximately three hours in cloudy northern regions to six or more hours in the desert Southwest.
Here is what the formula produces for common battery sizes in a five peak-sun-hour location, which represents a reasonable average for much of the US:
| Battery Capacity | Peak Sun Hours (Location) | Panel Wattage Required | Typical Panel Count (200W panels) |
|---|---|---|---|
| 500Wh | 5 hours | 100W | 1 panel |
| 1,000Wh | 5 hours | 200W | 1 panel |
| 1,500Wh | 5 hours | 300W | 2 panels |
| 2,000Wh | 5 hours | 400W | 2 panels |
| 3,000Wh | 5 hours | 600W | 3 panels |
| 5,000Wh | 5 hours | 1,000W | 5 panels |
These numbers assume the battery starts the day empty and the goal is a full recharge by evening. In practice, most off-grid setups run a daily surplus or deficit depending on consumption, so the battery rarely starts at zero. The formula still gives the right sizing target because it ensures the system can recover from a fully depleted state within one day, which is the minimum resilience standard for a setup you are depending on.
Field Note: The panel sizing question was almost always asked backward. Someone would come in with a 3,000Wh unit and ask how many panels they could connect to it. I would flip the question and ask how many peak sun hours their location got and how fast they needed to recharge. Most people in the mid-Atlantic were working with five to six hours in summer. The math pointed to 600W, which was three 200W panels. Then I would pull up the spec sheet to check the unit’s maximum solar input limit, which was the number that actually decided whether three panels were usable or whether two was the real ceiling. That spec sheet check changed the answer more often than the location calculation did.

Featuring 16BB N-Type cells at 25% efficiency, this panel outperforms standard 200W panels and folds down to backpack size at just 13.89 lbs, with a magnetic closure for tool-free setup. Three built-in ports including USB-C PD 45W, and two USB-A ports charge devices directly, while MC4 output connects to most power stations and 12V battery systems. Four adjustable kickstands offer 40, 50, and 60 degree angles, and IP65 rating plus UL 61730 certification ensure durability and safety backed by a 2-year warranty.
Check On AmazonIf you click this link and buy, we earn a commission at no additional cost to you.
The Real-World Efficiency Adjustment Most Guides Skip
The formula above produces a theoretical panel wattage requirement. Real-world solar panel output consistently runs 70 to 80 percent of the rated figure, and that gap matters for sizing. The difference between theoretical and actual output comes from four overlapping factors that affect every outdoor solar installation.
The first is angle and orientation. Rated output assumes the panel is perpendicular to the sun at peak intensity. A flat panel on the ground, a panel propped at a fixed angle that is not solar noon optimal, or a panel facing slightly off south all produce less than rated output. For portable foldable panels that get repositioned periodically, this factor is manageable but never zero.
The second is temperature. Solar panels lose efficiency as their cell temperature rises, typically around 0.3 to 0.5 percent per degree Celsius above the standard test temperature of 25 degrees Celsius. On a hot summer day with a panel sitting in full sun, cell temperatures can reach 50 to 65 degrees Celsius, which translates to a 7 to 15 percent efficiency reduction from temperature alone.
The third is connection losses. Wiring from the panels to the solar generator carries a small resistance that results in a small voltage drop. For properly sized wiring this is minor, but it is not zero.
The fourth is partial shading. Even minor shading on one corner of a panel, from a branch, a vent pipe, or an adjacent panel that casts a shadow during part of the day, can disproportionately reduce output on conventional panel designs.
The practical result is that a 200W rated panel reliably delivers approximately 140 to 160W in real-world outdoor conditions. For sizing purposes, apply a 0.8 efficiency multiplier to rated panel output. If the theoretical calculation says you need 600W of panels, size to 750W of rated capacity to hit 600W of real-world output. The adjusted formula looks like this: required panel wattage divided by 0.8 equals the rated panel capacity to purchase.
| Battery Capacity | Theoretical Panels Needed | After 0.8 Efficiency Adjustment | Adjusted Panel Count (200W panels) |
|---|---|---|---|
| 1,000Wh (5 sun hours) | 200W | 250W | 2 panels (400W rated) |
| 2,000Wh (5 sun hours) | 400W | 500W | 3 panels (600W rated) |
| 3,000Wh (5 sun hours) | 600W | 750W | 4 panels (800W rated) |
| 3,000Wh (6 sun hours) | 500W | 625W | 4 panels (800W rated) |
| 5,000Wh (5 sun hours) | 1,000W | 1,250W | 7 panels (1,400W rated) |
Note: These adjusted figures assume the unit’s maximum solar input limit is not the binding constraint. Always check the spec sheet for that number before finalizing panel count. The next section explains why that ceiling overrides every other calculation.
The Maximum Solar Input Limit: The Number That Overrides Everything Else
Every solar generator has a maximum solar input wattage built into its charge controller. This is the single most important specification for panel sizing, and it is the one most frequently overlooked. Adding more panel wattage than this limit produces no additional charging benefit. The charge controller simply does not accept input beyond its rated maximum, and the extra panel capacity sits unused regardless of how much sun is available.
This ceiling varies significantly across the product category. A compact 1,000Wh unit might accept a maximum of 200W of solar input. A mid-range 2,000Wh unit might accept 500W. A high-capacity 3,000Wh or larger unit might accept 800W to 1,600W. The exact figures depend on the specific model, not just the capacity class, which is why checking the spec sheet for your unit is a required step before buying any panels.
The maximum solar input limit can make the efficiency-adjusted panel count either achievable or impossible. Consider a 3,000Wh unit with a 400W maximum solar input limit. The efficiency-adjusted panel calculation for that battery in a five sun-hour location points to 750W of rated panel capacity. But if the unit accepts only 400W of solar input regardless, adding 750W of panels still produces a maximum charging rate of 400W. In five sun hours that delivers 2,000Wh of charge, leaving the battery 1,000Wh short of full from a depleted state. For this unit, achieving a full single-day recharge from empty is not possible with any panel configuration. Knowing that before you buy panels is worth considerably more than discovering it afterward.
Key point: Look for “maximum solar input” or “PV input” on the spec sheet. This number is expressed in watts. It is the ceiling on your daily solar charge regardless of how many panels you connect. If the number is lower than what your battery size and location require, either accept a multi-day recharge cycle or consider a different unit before purchasing panels.
How Location Changes the Panel Count Significantly
Peak sun hours vary enough across the United States that the same battery paired with the same panels produces meaningfully different recharge rates depending on where the setup operates. This is not a minor adjustment. Moving from a four sun-hour location in the Pacific Northwest to a six sun-hour location in Arizona changes the required panel wattage for a 3,000Wh battery by 50 percent in the base formula.
| Region | Average Peak Sun Hours (Summer) | Panels Needed for 3,000Wh Battery (Theoretical) |
|---|---|---|
| Desert Southwest (AZ, NM, NV, Southern CA) | 6 to 7 hours | 430 to 500W |
| Mountain West and High Plains | 5.5 to 6.5 hours | 460 to 545W |
| Southeast and South Central | 5 to 6 hours | 500 to 600W |
| Midwest and Mid-Atlantic | 4.5 to 5.5 hours | 545 to 667W |
| Northeast and Great Lakes | 4 to 5 hours | 600 to 750W |
| Pacific Northwest | 3 to 4 hours (summer), 2 to 3 hours (winter) | 750 to 1,000W summer; not self-sustaining in winter |
These figures are for the summer season when solar performance is best. Fall and winter reduce peak sun hours at every location, with the Pacific Northwest and northern tier states experiencing the most dramatic seasonal drop. An off-grid setup designed to be self-sustaining in July in Seattle will run a consistent daily deficit from October through February regardless of how many panels are connected, because the solar input window shrinks below what the battery needs to fully recover each day. Planning for seasonal variation before buying panels is considerably easier than discovering it mid-season.

This 1kWh LFP battery station charges from 0 to 80% in just 50 minutes via AC input, and its LiFePO4 chemistry delivers a 3,000 plus cycle lifespan that is roughly 6 times longer than standard lithium batteries. Capacity is expandable up to 3kWh with additional batteries, making it well suited for camping, RVs, or off-grid living. Its 1,800W output powers across 15 outlets, handling around 90% of household appliances, and accepts up to 500W of solar input for clean, fuel-free charging. The package includes a 5-year customer service guarantee.
Check On AmazonIf you click this link and buy, we earn a commission at no additional cost to you.
Translating Watts to an Actual Panel Count
Most portable solar panels for use with solar generators come in two common sizes: 100-watt folding panels and 200-watt folding panels. Rigid panels in 100W, 200W, and 400W configurations are also widely available and typically cost less per watt than folding versions, though they require mounting hardware and a fixed installation rather than portable deployment.
Matching a wattage target to panel count is arithmetic: divide the required wattage by the individual panel wattage and round up to the next whole number. A 600W requirement using 200W panels is three panels. A 750W requirement using 200W panels is four panels since three panels at 600W falls short of the adjusted target. A 400W requirement using 100W panels is four panels.
One additional constraint worth checking before finalizing panel count is whether your unit’s maximum solar input limit creates a series versus parallel connection requirement. Solar generators accept panels connected in either series, which adds voltages, or parallel, which adds currents. The charge controller’s maximum input voltage is the ceiling for series connections. Connecting panels in series that push the combined voltage above the charge controller’s maximum input voltage damages the unit. The spec sheet will list both maximum input wattage and maximum input voltage. Both limits apply.
For setups involving multiple panels, confirming whether to wire series or parallel requires matching the panel open-circuit voltage (Voc) multiplied by the number of panels in series against the unit’s maximum input voltage. For most portable folding panel setups with two to four panels, parallel wiring stays well within the voltage limit and is the simpler configuration. For larger arrays approaching the wattage ceiling, series wiring may be required to deliver sufficient voltage for the charge controller to operate efficiently.
For how panel sizing fits into the full off-grid planning picture alongside battery capacity decisions and daily load math, the off-grid solar generator guide covers the whole system view for cabins, tiny homes, and other off-grid use cases. For buyers still choosing a unit before buying panels, the solar generator selection guide covers how to match battery capacity and solar input specs to your actual use case from the beginning.

Powered by IBC bifacial cells at up to 26.7% conversion efficiency, this panel outperforms conventional PERC panels and maintains strong output in low-light conditions. Six panels together can fully charge a 2,042Wh power station in just 2.5 hours, and 10-second setup with an ergonomic handle makes deployment effortless. IP68 waterproofing and an operating range of -4 to 149 degrees Fahrenheit ensure year-round reliability across all weather conditions.
Check On AmazonIf you click this link and buy, we earn a commission at no additional cost to you.
Final Thoughts: Three Numbers That Determine Your Panel Count
Panel sizing comes down to three numbers, checked in the right order. First, your battery capacity in watt-hours. Second, your location’s average peak sun hours during the season you plan to use the system. Third, your unit’s maximum solar input limit from the spec sheet. The first two give you the theoretical panel wattage requirement. The third tells you whether that requirement is achievable with your specific unit or whether the charge controller becomes the binding constraint before panel count does.
Apply the 0.8 real-world efficiency factor to the theoretical figure and you have the rated panel wattage to purchase. Compare that against the unit’s maximum input limit. If the adjusted requirement exceeds the limit, the unit cannot fully recharge in a single day from empty at your location, and no panel addition changes that. If the adjusted requirement falls within the limit, your panel count is confirmed and the system is properly sized for single-day recovery.
That sequence takes about ten minutes and eliminates the two most common panel sizing mistakes: buying too few panels because the efficiency adjustment was skipped, and buying more panels than the charge controller can accept because the maximum input limit was never checked.
Featuring 16BB N-Type cells at 25% efficiency, this panel outperforms standard 200W panels and folds down to backpack size at just 13.89 lbs, with a magnetic closure for tool-free setup. Three built-in ports including USB-C PD 45W, and two USB-A ports charge devices directly, while MC4 output connects to most power stations and 12V battery systems. Four adjustable kickstands offer 40, 50, and 60 degree angles, and IP65 rating plus UL 61730 certification ensure durability and safety backed by a 2-year warranty.
Check On AmazonIf you click this link and buy, we earn a commission at no additional cost to you.
FAQs
☀️ How do I calculate how many solar panels I need for my solar generator?
Divide your battery capacity in watt-hours by your location’s average peak sun hours. That gives the theoretical panel wattage for a full single-day recharge. Divide that figure by 0.8 to account for real-world efficiency losses, giving you the rated panel capacity to purchase. Then confirm your unit’s maximum solar input limit does not cap the result below your requirement.
🔋 Can I add more solar panels than my solar generator’s rated input?
No. Adding more panel wattage than the unit’s maximum solar input limit produces no additional charging benefit. The charge controller accepts input up to its rated maximum and ignores anything beyond it. Check the spec sheet for “maximum solar input” or “PV input” in watts before buying panels. That number is the ceiling regardless of how many panels you connect.
🌍 Does location affect how many solar panels I need?
Significantly. The same 3,000Wh battery requires about 500W of panels in Arizona at 6 peak sun hours and about 750W in the Northeast at 4 peak sun hours for a full single-day recharge. Pacific Northwest locations average 3 to 4 peak sun hours in summer and 2 to 3 in winter, making full single-day recovery from a depleted state impractical during the winter months regardless of panel count.
📉 Why does rated panel wattage not match actual output?
Rated output assumes optimal angle, full sun intensity, and a panel cell temperature of 25 degrees Celsius. Real conditions include non-optimal angle, partial cloud, heat-related efficiency loss, and minor wiring losses. Real-world output consistently runs 70 to 80 percent of rated capacity. A 200W panel reliably delivers 140 to 160W under normal outdoor conditions. Use a 0.8 multiplier on rated output when sizing panels for real-world performance.
🔌 Should I wire solar panels in series or parallel?
For most portable folding panel setups with two to four panels, parallel wiring is simpler and stays within voltage limits. Series wiring adds voltages, and the combined open-circuit voltage of panels in series must not exceed the unit’s maximum input voltage rating. Check both the maximum input wattage and maximum input voltage on the spec sheet. For small panel counts, parallel is the safer default. For larger arrays, confirm the wiring configuration against both limits before connecting.
⏱️ How long does it take to recharge a solar generator with solar panels?
Recharge time from empty equals battery capacity divided by actual panel output in real conditions. A 3,000Wh battery with 600W of rated panels producing 480W of real output needs approximately 6.25 peak sun hours to recharge from empty. If your location averages only 5 peak sun hours, that setup falls short of a full single-day recharge. You would need roughly 750W of rated panel capacity, assuming 80 percent real-world output, to recover 3,000Wh in five peak sun hours.